
How to make Salt Dough Doughnuts
Using three simple ingredients, our really easy salt dough recipe is great for crafting and basic sculpting

National Donut Day is June 2nd
And it’s one of our favorite snacks! My kids and I created our own "Dough"-nuts (get it? because its made from salt..."dough"? ) using a simple 3 ingredient salt dough recipe! Even though these "dough"-nuts are safe to eat I would not recommend actually eating them, especially after they are painted, but rather use them for pretend play and crafting.

Getting Started
(If you want to bake your creations then preheat the oven to 400° F)
Measure out all the ingredients, pour them into the large bowl and combine them. We poured 2 cups of flour in the bowl and set aside 1/2 cup for later.

Mix it up!
Combine the 3 ingredients.
This step is preferably by hand and i really preferred that its by hand by my kids!
This was my daughters' favorite part....getting messy! I, unlike my daughters, do NOT enjoy mushy textures on my hands! However, I did eventually get my hands in the bowl with my daughters, reluctantly.

A “Sticky” Situation
The dough might get really sticky at first, this is where the extra flour comes in to save the day! They were loving this part and slightly horrified by the mess they were making! If its waaaay too sticky (as shown here) then slowly add more flour until the dough is no longer as sticky or can be formed into a ball.
Remember: If it's too dry, slowly add more water and if it's too sticky, slowly add more flour

Need to Knead
Once your dough is of a thicker, less sticky consistency, then its ready to knead (again, one of the girls' favorite steps!).
I used a strip of wax paper to help make it less sticky but that is optional. Sprinkle the surface with flour and fold the dough repeatedly into itself. Repeat this process until the dough is smooth and not crumbly or sticky.

Yay, Salt Dough!
When the dough is smooth, soft, not crumbly and not sticky, then its ready to play with!

Forming the "dough"-nuts
To form the "dough"-nuts, we took small pieces of the dough, rolled them into longer tubes (or "making snakes" as I called it) and then closed the ends of the tubes into circles. As beautifully demonstrated here by my flour-covered daughter!

Time to decorate!
Now that the "Dough"-nuts have dried (and cooled if baked), it's time to decorate them!

Get Creative!
Using acrylic paint and paint brushes, paint the "Dough"-nuts. We created wild and wacky "flavors" and even used some extra dough to make "sprinkles" on some.
My "Dough"-nuts were a Neapolitan colored one and one I called "Earth"- Blue paint to be "blue raspberry", green paint to be "lime" and brown paint to be "chocolate land sprinkles". The girls really got a kick out of that one!
Free Donut Time!
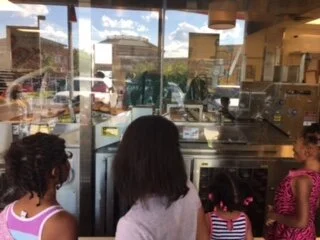
After we made our own pretend "Dough"-nuts, we took a trip to the local Krispy Kreme shop. We got to see how the real doughnuts are made and the girls were fascinated!

Yummy!
Krispy Kreme gave away free donuts in honor of National Donut Day and we enjoyed every second of it!