
Diy Shower Curtain
I couldn’t find the shower curtain I had in mind, sooooo I decided to make it myself!

“ Why in the world would you want to make your own shower curtain?!?”
Well……..cuz I’m a crafter, of course! Honestly, I was redecorating my kids’ bathroom in our house. After a LOT of brainstorming, I finally found a theme that all of my kids would like (a miracle, I know 🤪). The theme was EMOJIS but after searching everywhere , I just could NOT find an emoji shower curtain that I loved. That’s when it hit me to just make it myself and so I did!

Get a plain shower curtain
I went to Walmart and purchased a plain white fabric shower curtain (about $9). I have always wondered who gets the blank shower curtains well now I'm in that club!
The one that I purchased ended up being a waffle-textured fabric, which presented a challenge in painting (I'll explain later on). I highly recommend using a smooth non-textured fabric shower curtain if at all possible. If you can't find one then using a textured shower curtain will be fine, just be prepared to do a little more work.
Paint, paint and more paint!
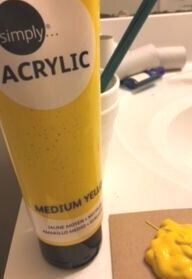
I used acrylic paint to paint the emojis on the shower curtain. I got a REALLY big bottle of acrylic paint in medium yellow because I had a LOT of emojis to paint :)
For other parts of the project, I used smaller bottles of craft acrylic paint (black, white, red, blue).

Find a place to paint the curtain
Honest Crafter Moment: It was a lot more complicated than I originally thought trying to figure out where I should paint the curtain! :)
I decided to paint it up against the glass shower doors I had in a different bathroom. However, I have also made separate shower curtains on the floor just make sure that you put something behind it (Like an old bed sheet, a paint tarp or a plastic table cloth) because the paint will bleed through the curtain.
What worked the best for me was when I ended up "Magyever"-ing the curtain by using the hooks from an old "Over-the-door" shoe rack that I had. I also found that masking tape in various places also helped to hold it up even when I did not use the hooks.

Sketch out the design
ANOTHER Honest Crafter moment: Never "Sketch" anything in Sharpie! I, however was so excited to get started on the project that I grabbed the closest thing to me....a sharpie....admittedly not the greatest idea I've had 😑
I sketched the circles for the emojis onto the shower curtain. It was surprisingly successful until I got to the big emoji. I made a mistake in the sketching and could not undo it because, you know, IT’S SHARPIE! 🙃 #lessonlearned

Time to Paint!
I started painting the emojis (extremely therapeutic BTW) and it was going REALLY well, except....Remember that "challenge" I mentioned earlier? Yeah….
The textured shower curtain required more paint per stroke. Since it was a waffle print, the paint had difficulty getting into each tiny little square. So I would have to go over one area several times just to get the area completely saturated with paint. It increased the amount of time, energy and paint that I had to use. Thus the reason why I highly recommend to not used textured curtains. It will work but ugh it was just so much easier when I used a smooth surfaced shower curtain.

Add the details
This was definitely my favorite part of this project. Adding the details to each emoji really made it official to me!
I couldn't figure out how to cover my sharpie "mistake" (because paint was NOT covering it) So I decided to turn the "mistake" into a hat on the large emoji.
In hindsight, I'm really glad I made the "mistake" because the hat ended up being super cute in my opinion :)
I feel like it’s a total Bob Ross moment! Turning my mistake into a “happy little accident” well more like a happy giant hat....no more sketching in sharpie though...

Add the background
I wanted the color scheme of the kids' bathroom to be gray and yellow. However, a giant white shower curtain did not "flow" with that theme. That's the beauty of a DIY project, its ultimately up to me to decide what the project needs or doesn't need!
So I painted a background on the curtain! I made my own shade of bluish-gray and gray. I painted the colors on a diagonal using a large paintbrush. The larger paint brush really made painting the background a breeze!

Waterproofing
I figured that all that hard work I put into creating the shower curtain needed to be protected. I purchased a waterproofing spray, took the shower curtain outside so i could spray it down, let it dry and then hung it up! I also put a shower curtain liner behind it just for additional protection and to extend the longevity of the curtain.

Finished!
Finally! The shower curtain essentially became a giant canvas for me to paint on which was awesome. It was a bit time consuming but with 7 kids, almost all of my diys end up running longer than normal. 😅 The blueish gray colors definitely tied the color scheme for their bathroom together. Plus the giant emoji definitely makes us all smile when we see it!
